Quickstart
From an empty directory to your first confirmed print. Measured: 7 min 21 s on a clean Windows machine.
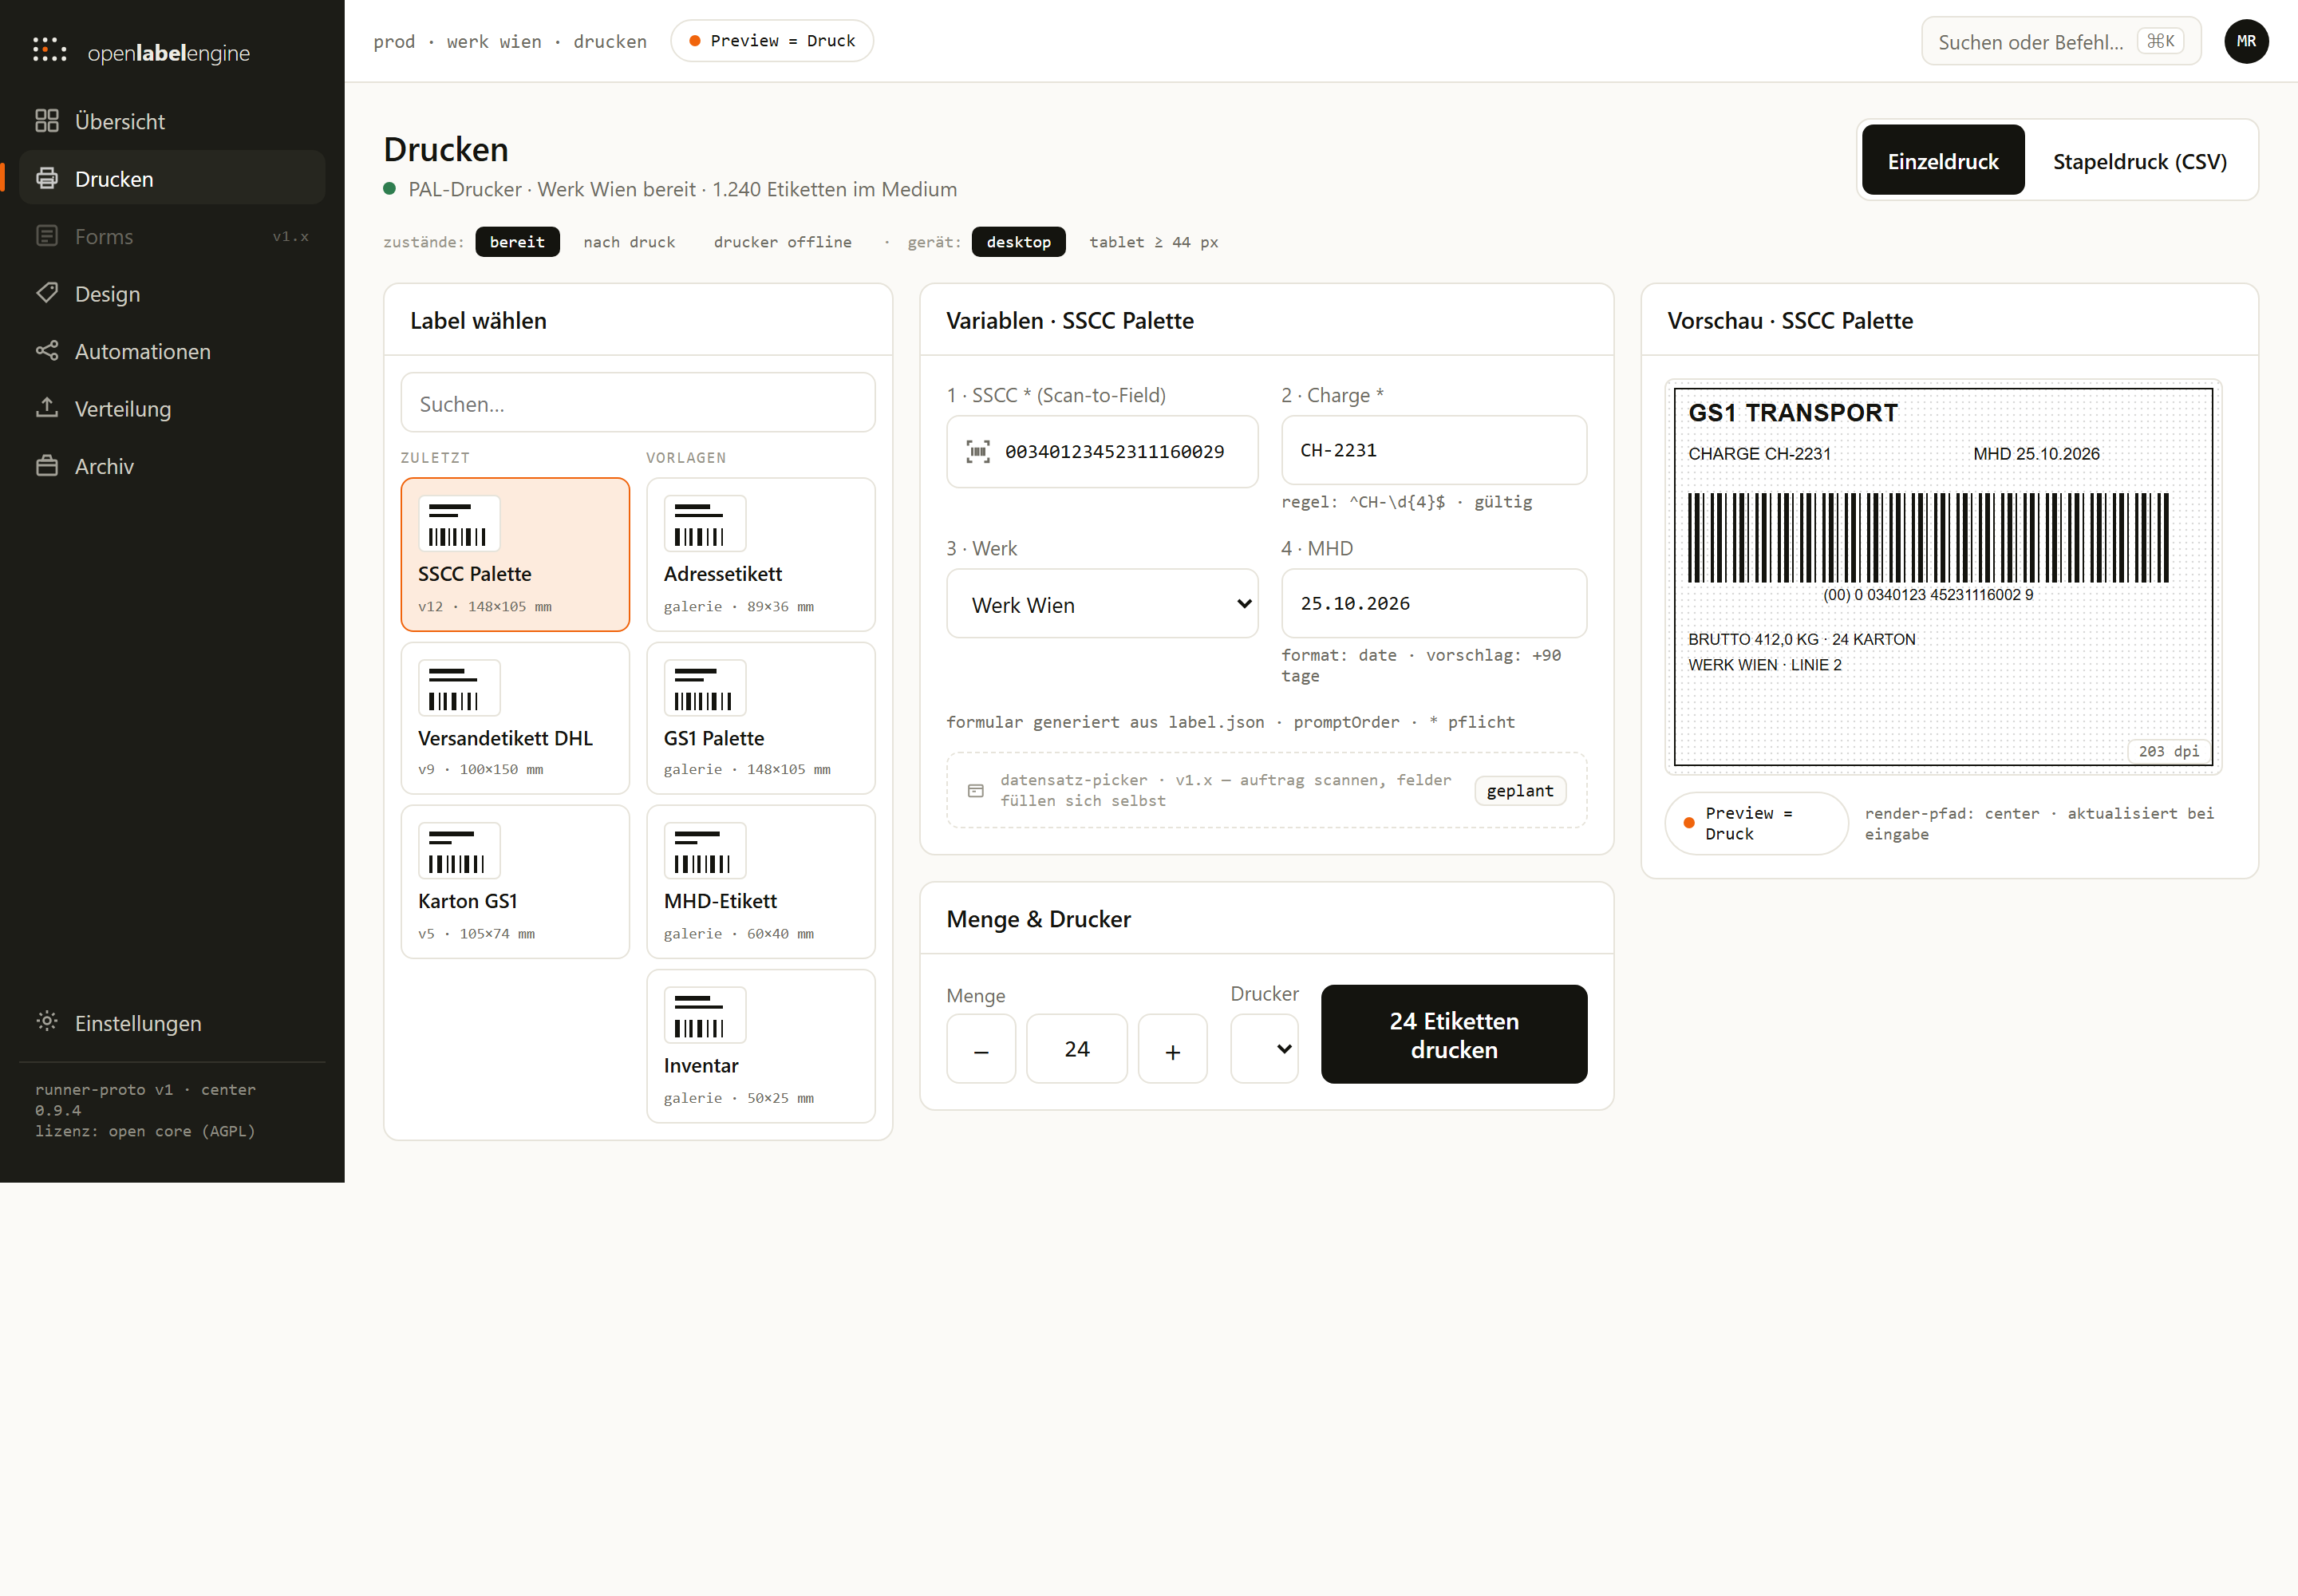
What you see at the end: the Print Center with your first label selected and the live ZPL preview on the right.
Download & verify
Get the release from GitHub and verify all checksums.
gh release download v0.1.0-beta.1 --repo Stevethebeef/openlabelengine
# verify: all 8 checksums must match
Start the Center
Run the installer. It configures autostart and opens port 8090.
# Windows (amd64)
.\install.ps1 -Port 8090
# Linux (amd64/arm64)
chmod +x install.sh && ./install.sh --port 8090
Create your admin account
Open the browser at localhost:8090. The first-run wizard creates your admin account. No default password exists.
Connect a Runner (one line)
The Runner enrolls via CSR and appears in the Center immediately.
ole runner join --url https://your-center:8090 --group production
Print your first label
In the Center: Design → choose a gallery template → fill variables → print. You will see confirmed ✓✓ when the printer acknowledges. That check mark means the printer confirmed, not just received.
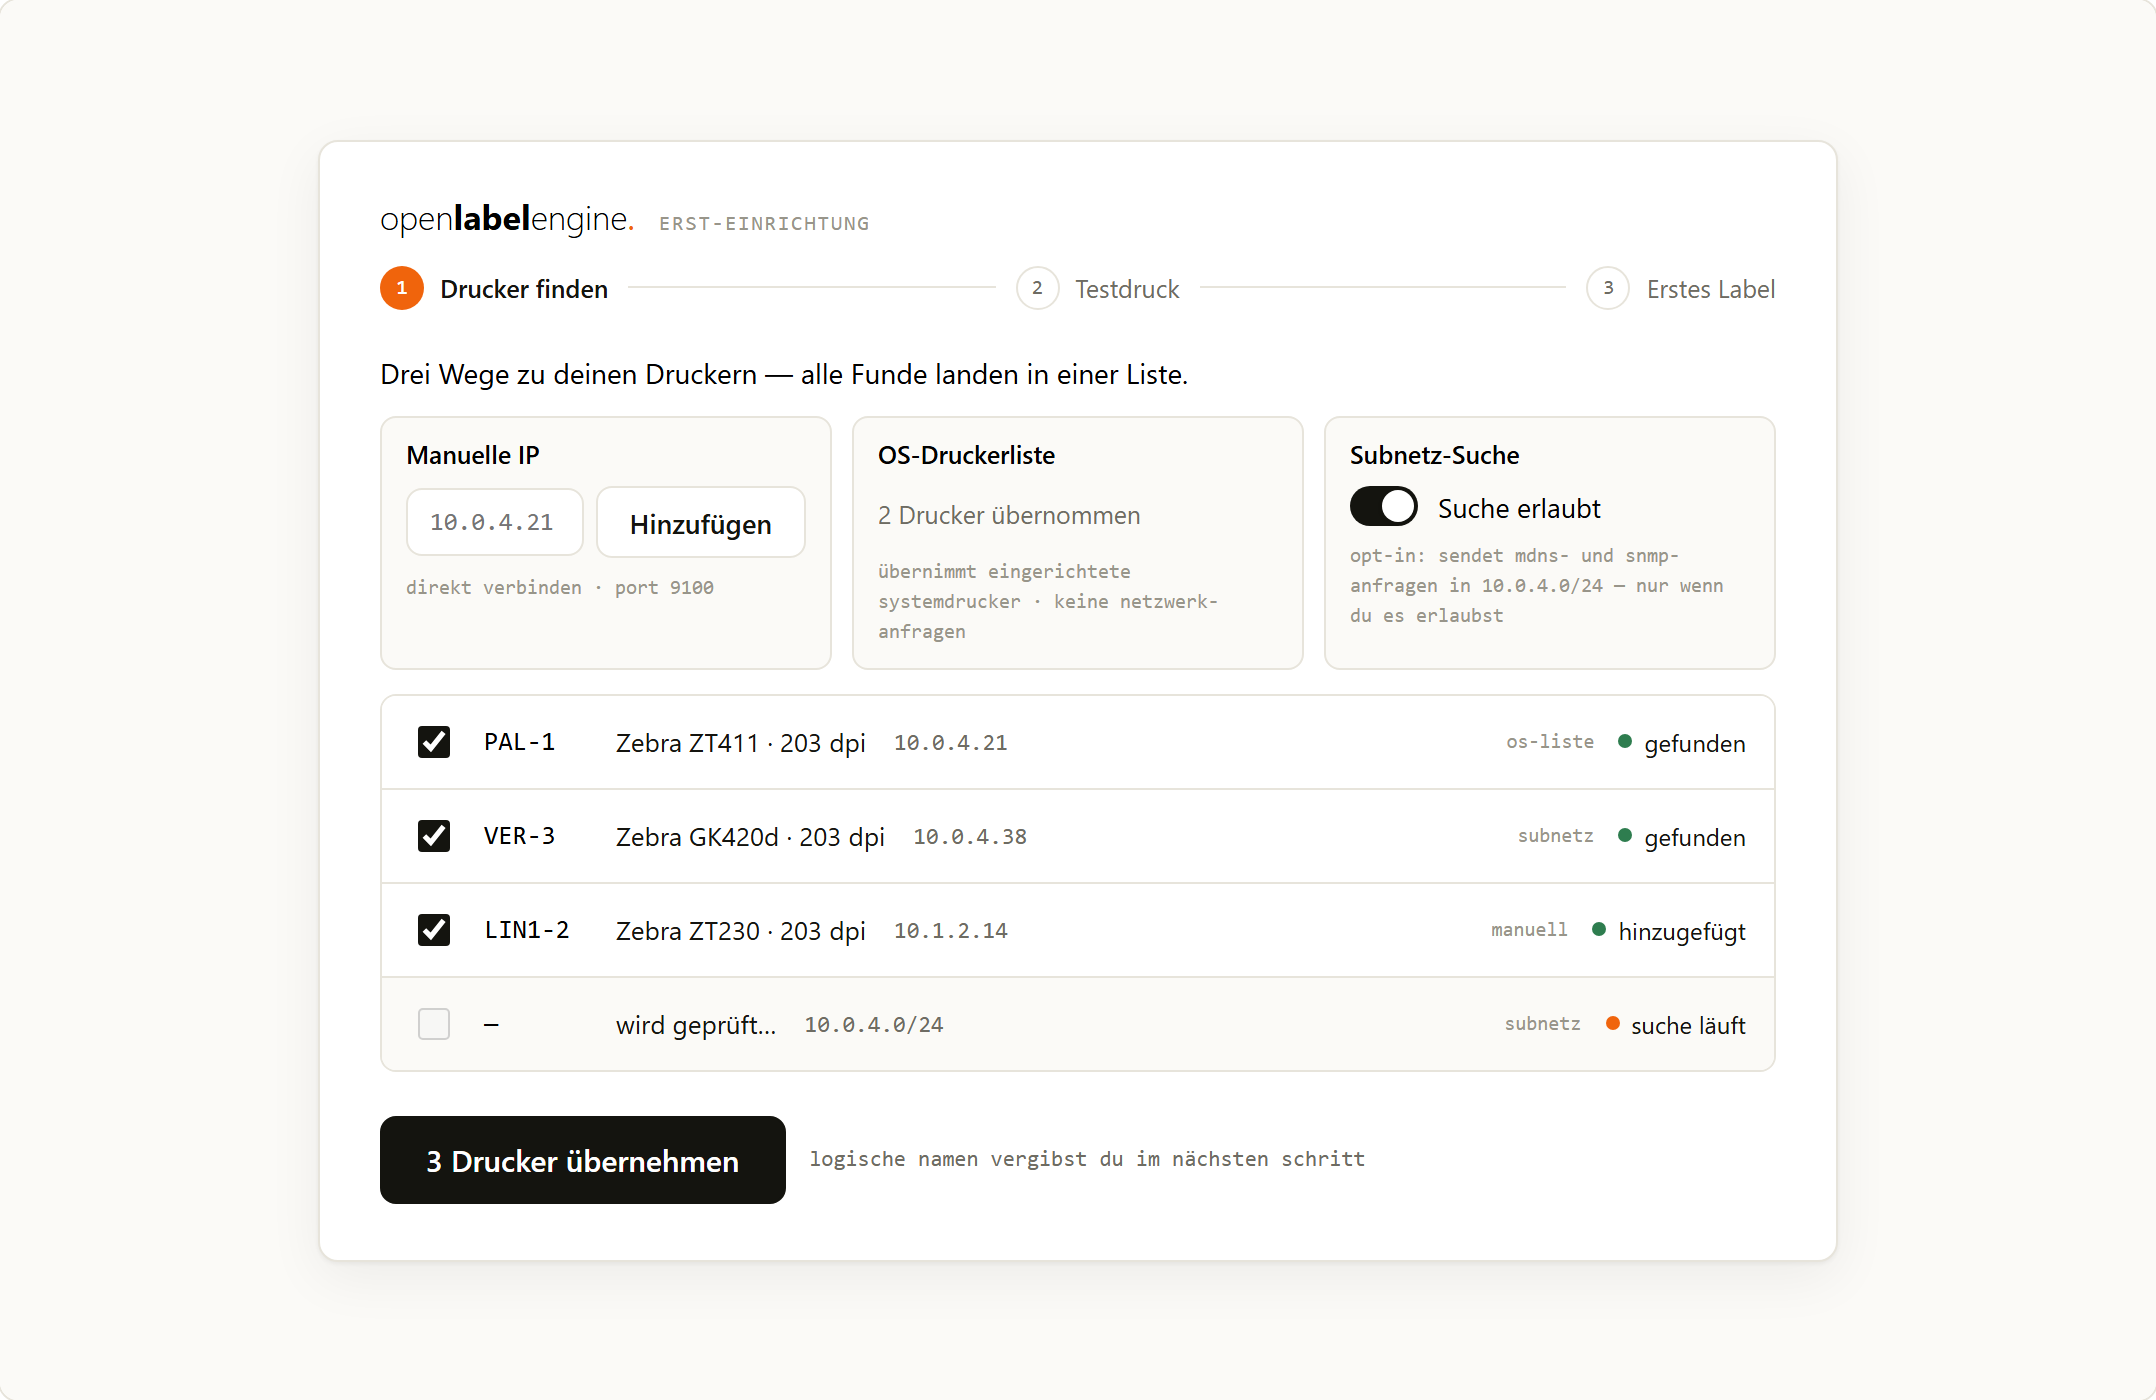
First-time setup: printers are found via subnet scan, manual IP or OS printer list..
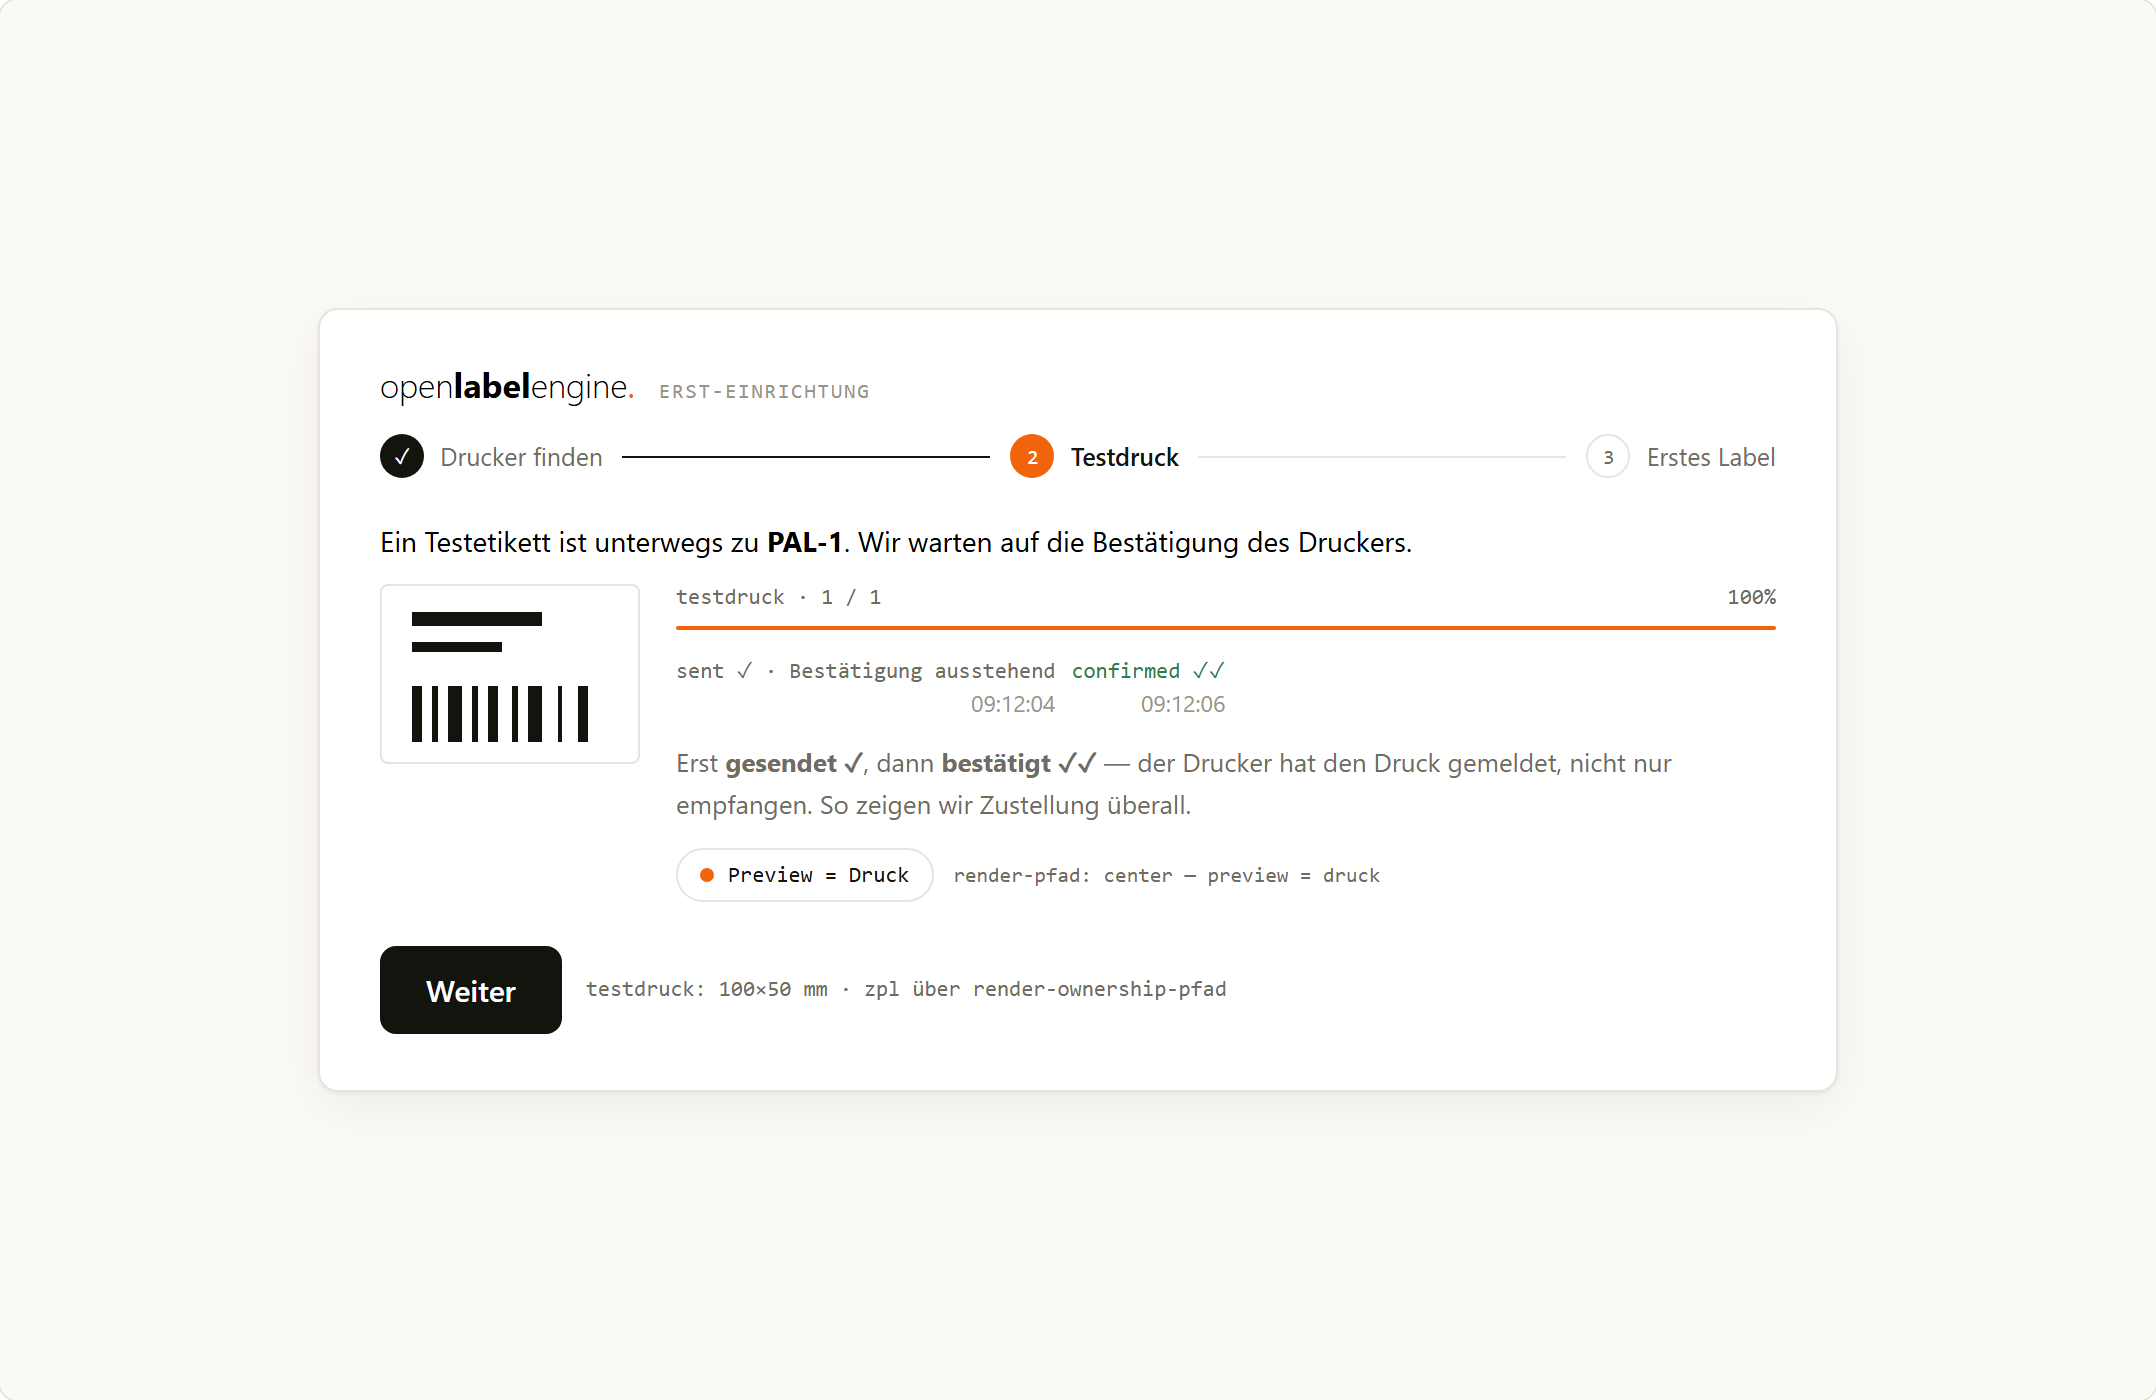
Testdruck: Erst gesendet, dann bestätigt. The printer acknowledges — the checkmark carries the confirmation.